Monday, 30 August 2010

Layers

Today, Simon Says Stamp and Show set the challenge to create something with layers. This is my finished piece.

Credits: Image - Paper Whimsy; clock stamp - Paper Artsy 

I started out with a piece of Grunge Board that I embossed, sprayed black and, once dry, lightly rubbed gold paint over to highlight the pattern. I lightly sprayed a piece of felt to take off the newness. The next layer was a piece of calico that I stamped and painted with diluted acrylic paints. I attached all the fabric layers together with stitching and mini attachers, adding the lace, the picture of the girl, the stone in the middle of the clock and the flower, and then stuck this to the Grunge Board..

Sunday, 29 August 2010

I'm back ....

but then you probably haven't noticed I've been away, except that I haven't left comments on your blog - sorry. My last ten posts were scheduled to appear automatically whilst I was on holiday!

I am back but I have my sister visiting so posts will be a little sparse this week, but whilst she is in bed (!) I have created a postcard for Sunday Postcard Art - the theme is 'darkside'. Here is my take on the theme.

Credits T Baxter @ SBG & TotallyWildDezinez @ Deviant Scrap

Friday, 27 August 2010

Packing tape transfers

Nowadays, I find it hard to sit in front of the TV without doing something, so a few evenings ago I tried making some packing tape transfers. For a first go they came out pretty well, I think, but I did learn that it does make a difference what kind of magazine is used. An old National Trust magazine doesn't give quite as good a result as an old copy of The Big Issue for example. The paper is thinner in the latter and it is much easier to get a transparent finish with it.


Start by sticking your chosen picture, face down, onto some clear packing tape. Try to make sure not to get any creases or bubbles in it. You can see the result of creases on the bottom left transfer! Burnish the paper well i.e. rub with a bone folder of spoon. Spray the paper with water until quite wet (some people soak the strips in a bowl of water for a few minutes) and then start gently rubbing the paper off the back of the tape with your finger. This does take quite a while, but if you have chosen a thinnish paper you should end up with a reversed, transparent image on your tape.

Duh .... I've just realised that I should have put them on a non-white coloured piece of paper and then you would have got more idea of the transparency. Oh well, next time!

Thursday, 26 August 2010

Sea scenes

Two, very different digital collages, using Tangie Baxter's 'Tempest Tossed' kit.


Wednesday, 25 August 2010

More journal pages

I am really enjoying journalling on these square pages!


Monday, 23 August 2010

Another black tag ....

To make this tag I stamped on the quote, a stamp by Tim Holtz, with Perfect Medium, a clear embossing ink. I covered it in clear embossing  powder, shook off the excess and heated it to get a clear raised image. At this point it was very difficult to see as it just appears black. Now for the cunning bit! I swiped light blue acrylic paint all over the tag and left it for a few minutes to start drying. When it was getting tacky I used a slightly damp paper towel to start wiping off some of the paint. This removes some of the paint on the tag, but all of the paint covering the quote, which now makes it readable. Double-click on it to see it properly.
The sari-waste ribbon adds the finishing touch.

Sunday, 22 August 2010

Architecture


The background, a drawing of Sophia Hagia in Istanbul (supplied by Paper Whimsy), prompted this digital collage.

Saturday, 21 August 2010

Cards

I haven't made many cards recently, so I thought it was about time I did! Both of these are made using Anna Griffin papers and the images are from Paper Whimsy. The bow is made from Sari waste - I love this stuff! It comes in a large bundle of silk strips in assorted colours.


P.S. The cards aren't really bent, just my bad photography! They are also a bit less anaemic in real life!

Friday, 20 August 2010

Bird tile

To decorate the tile I covered a thick cardboard tile (made by Magenta) with a rough layer of Viva Terra, a texture paste, and heated it to create extra texture. I painted it black and, once dry, used my index finger to swipe green and copper Inka Gold over the raised areas.

I stuck some cream coloured metal to a piece of scrap cardboard and stamped the bird (Paper Artsy) onto the metal. Having cut it out, I used the same colours of  Inka Gold to paint it and then edged the metal with a wheel tool. I coloured the edges with a gold Krylon pen.

I attached the bird to the tile and added the bead, which I had coloured with alcohol ink.

Thursday, 19 August 2010

Scrap bits of loveliness!

Whenever I am painting in my journals, or spraying paint onto pieces I am creating I have lots of scrap paper around to protect other pages or pieces of my craft work. These pieces of scrap paper invariably end up getting covered in paint. Sometimes I deliberately add more paint or patterns to them so that they can then be used in my journals. There's nothing like recycling! Here's a couple of examples.


Wednesday, 18 August 2010

Not all butterflies are free ...

A digital collage.
Credits: image of the children - Craft Stamper; the butterfly - TotallyWildDezinez at Deviant Scrap; and the background - Studio Manu at SBG. 

Tuesday, 17 August 2010

What do you see?

I have been experimenting with different textures and marks for journal page backgrounds. This was the result! Double-click on it to see more details.

Monday, 16 August 2010

Compendium of Curiosities 10

Linda Ledbetter (find her here) is running a series of challenges, each featuring a technique found in Tim Holtz's book 'A Compendium of Curiosities'. This week the challenge is to use Distress Stickles, a type of glitter glue made by Ranger. A week or so I visited LB Crafts and found some black tags; I hadn't seen these before so I bought a packet. So this seemed the ideal opportunity to try them out.


To start, I sponged on some peach colour acrylic paint onto the tag. I then stamped over it with a Paper Artsy number stamp using turquoise acrylic paint. A spray of peach Glimmer Mist in strategic places added a bit more colour.  To make the embellishment, I used a piece of patterned, peach coloured card and distressed the edges. The picture of the girl is a Paper Whimsy image. Again, I distressed the edges, and this is where the Distress Stickles came in, I covered her with Rock Candy Stickles. This is clear so it gives the image some dimension without obscuring any of it - I hope you can see it in my picture. Double-click on the girl for a better view. I attached this onto the orange card, and also added the ticket, using my Tiny Attacher (tiny staples). I tied some sari waste around this before attaching it to the tag. I attached some more sari waste at the top as a ribbon.

Sunday, 15 August 2010

Mushrooms

Here is my dark and humorous interpretation of the theme from Sunday Postcard Art this week.  Double-click on one of the mushrooms if you want a better view!

Credits: all elements from T Baxter's 'Fieldnotes', @ SBG

Saturday, 14 August 2010

Itinerary 33

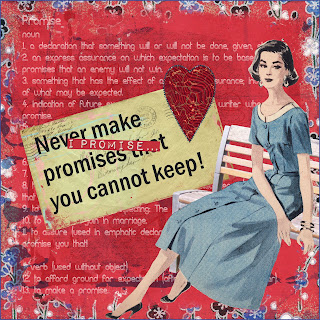
Promises - that's the theme this week.

First my mixed media pages. I started by brushing acrylic paint onto acetate and then 'printing' it onto my pages. I did this several times with different colours. I then stamped on several different sized circles using the rims of beakers and the ends of corks. I die-cut the circles and glued them onto the page and journallled or doodled over these.


As usual, a very different digital piece!

Credits: T Baxter & A Sexton, Studio Manu, all @ SBG

Playing with alcohol inks

My sister gave me some glossy advertsing postcards that had been used to publicise an event at her church. Obviously the front of them are filled with the advert, but the back is pure white glossy cardstock that does not emulsify when alcohol inks are applied. So I've been playing - well I couldn't let them go to waste, could I! This is the result.

Thursday, 12 August 2010

Playing with Lutradur


To make this I coloured the Lutradur with diluted Dye-na-Flow inks. After leaving a while to dry, I cut the dyed Lutradur into two and transferred three birds onto one half using matte medium. Once again, this had to be left for quite a while to dry. I then used my heat gun to fuse the two pieces together. The Lutradur disintegrates in the heat, whilst the areas where the matte medium was applied remained unscathed. 

I can see I am going to have to do some more experiments!

Wednesday, 11 August 2010

Doors

I thought I would offer a something a little different for the Three Muses' challenge this week, so I have created a journal page. Hope you like it!


I started by pasting text onto my page and then sprayed over stencils with black and white paints. I pasted on the doors and then doodled around the stencilled shapes. I added my journalling at the end (you may have to double-click on it to see it properly).

Tuesday, 10 August 2010

Itinerary 32

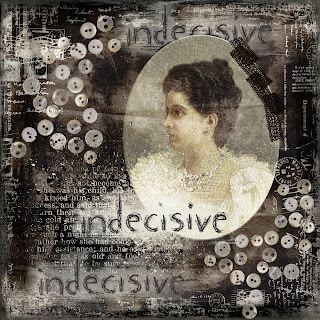
Art Journal Caravan prompted us this week to think about being decisive and doing those things that are good for us, and to think about why we don't do them.

I'm still stuck on strips, so to start my mixed media pages I stuck on several strips of scrap paper! I then sprayed ochre paint through a doilly over them. I then wrote my journalling  and added the figures for additional interest.


Once again, my digital page is very different, both in style and in colour.

Credits: T Baxter & A Sexton @ SBG

Monday, 9 August 2010

Wings and things ...

Linda Elbourne is the Director of a new challenge site called 'Simon says Stamp and Show'. She put a plea out to all readers of her blog asking for submissions in case nobody entered!!! Anyway, I thought I would oblige (won't tell her I was going to do so anyway!) and, guess what, I found another Pringle lid lying around so that just had to be my substrate.


I used a piece of Tim Holtz card, cut it to size and then attached a piece of dictionary page that I had coloured with Vintage Photo Distress Ink. I then stamped 'take flight' onto it twice. To take the glare of the plastic away, I edged the lid with Rust alcohol ink. I die-cut the Grunge Board shapes and used Distress Ink to colour them, applying Fired Brick Distress Stickles to the heart. I stuck these onto the lid with Glossy Accents. While waiting for these to stick properly I used Rust alcohol ink to lightly colour a bead that says 'soul' and a Tim Holtz metal bird. Having put in the circle of decorated card at the back of the lid, I stuck a memo pin through the lid and attached the bird with jump rings. I then used the same stamp (from Paper Artsy) as earlier on a piece of scrap card, tore it and coloured it and pushed it into the memo pin. Sticking on the bead completed my altered lid.

You can find 'Simon says Stamp and Show' HERE.

Sunday, 8 August 2010

Sunday Postcard Art

This week the theme is houses and I decided to go hand-made rather than digital.


You may remember the background (see my post on 22nd March), it's a piece of the newspaper that I painted with acrylic paint. I was spraying over a stencil recently and I used my wet stencil as a stamp onto this background. I cut this to size - yes, I did remember this week! - and added the embellishments. The house is made with two pieces of card. After I had sketched in the windows and doors I cut them out and added a piece of an old dictionary page behind them. The little girl at the door is a tiny sticker. I added the flower, which you may also recognise from a previous post (see 22nd May) and the hand-written quote. Simples!

Thursday, 5 August 2010

Text

The suggestion for the new crusade at GPP Street Team is to cut words and phrases from magazines, newspapers, junk mail etc and to make backgrounds from them. Here are my first two pages. I haven't yet decided whether to leave them as they are or to apply some decoration to them. Time will tell...


Wednesday, 4 August 2010

Love is blind

I had fun creating my digital piece for The Three Muses this week (except that the computer crashed half way through, and of course I hadn't saved it so I had to start all over again!!).
Credits: Ruby Rynne

Tuesday, 3 August 2010

Itinerary 31

This week, the prompt from Art Journal Caravan was to think of a toast each day. 'Here's to ......' So here are my my mixed media pages. I started out by pasting on torn strips of paper. I then sprayed Glimmer Mist over a stencil and, when dry, applied the stickers. Then came my toast and the doodles in various colours of pen. I added the orange stamps with acrylic paint and a light wash of the same over various parts of the pages.


My digital piece is based on the verb for this week ....meander.

Credits: Main elements - T Baxter, A Sexton; Flower & birds - B Kerr; Stitching Ztampf; all @ SBG

Monday, 2 August 2010

Grid lock

Having enjoyed using strips in my journals so much, I decided I would take a look at the previous GPP Street Team challenge. The theme was Grid Lock.


So I set to, and created two journal pages using grids. Here they are. The rectangles on the first one were cut from a sheet of scrap paper. I sprayed Glimmer Mist over a stencil and then stamped it and added the various embellishments.


The rectangles on my second piece were from a printed copy of a masterboard that I made quite a while ago. Again, I used a stencil, stamped the swirls and added the sticker quote.


Sunday, 1 August 2010

Smile

Sunday Postcard Art instructed us to use patchwork this week. Here is my digital piece. The figure and saying are from R McMeen's Dirce collection - I think they are such fun whilst also hitting the nail on the head for how we may sometimes feel. All the material and stitching elements come from Ztampf, also at SBG.


Duh! I have just realised I made my piece square instead of postcard size - hope you'll forgive me!